
How to Design Lash Packaging?
In the crowded beauty aisle — whether physical or digital — your lash packaging is your most dedicated salesperson. It’s the very first touchpoint a customer has with your brand, the silent ambassador that communicates your quality before a single lash is applied, and the beautiful container that protects your precious product on its journey from factory to doorstep. Great lashes in a mediocre box will be overlooked, while exceptional packaging can make a brand-new company feel like an established favorite from day one.
Designing packaging that truly sells, however, involves far more than picking a pretty color. It’s a strategic process that balances brand identity, customer experience, and production realities. Poorly planned packaging can lead to damaged products, a tarnished brand reputation, and missed sales opportunities — all of which are costly mistakes, especially for a new business.
This guide walks you through the essential steps to design custom lash packaging that not only looks stunning but also functions flawlessly and converts shoppers into loyal customers. As a factory-direct partner with over 15 years of experience helping 300+ brands worldwide, we at Lashvee have guided hundreds of entrepreneurs through this exact journey, and now we’re sharing everything we know.
Why Your Lash Packaging Is a Powerful Brand Asset
Before diving into the how-to, it’s worth understanding why packaging matters so much. According to a widely cited survey, 72% of American consumers say that packaging design influences their purchase decisions [1]. For a beauty product like false lashes, where the visual and tactile experience is central to the brand promise, this figure is likely even higher.
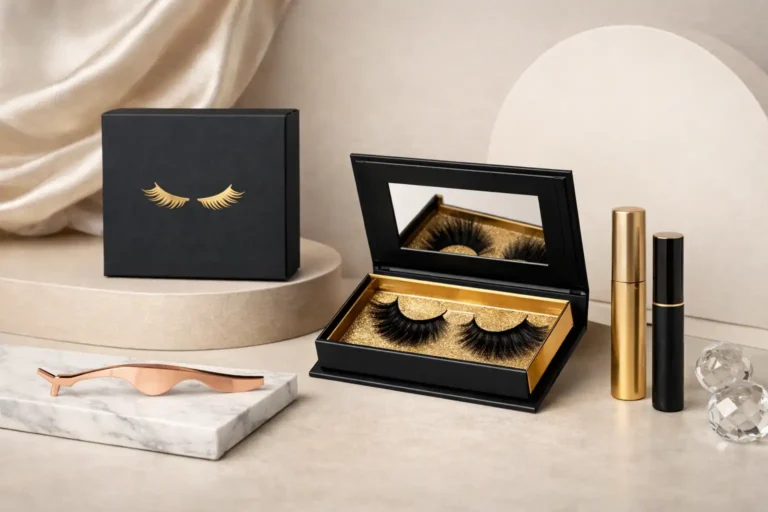
Think of your packaging as a brand asset that performs three distinct but equally important functions. A successful design masterfully combines all three to create an unforgettable customer experience.
Its primary job is protection. Your lashes travel a long way — from a factory in Qingdao to a customer’s home in New York or London. Sturdy, well-designed packaging ensures they arrive in perfect condition, preserving the delicate curl and structure. Damaged products lead to returns and negative reviews, which can be fatal for a new brand.
Second, packaging is all about attraction. Whether it’s sitting on a salon shelf or appearing in a product photo on Instagram, your box needs to grab attention instantly. It should visually represent the style of the lashes inside and create a sense of desire that makes a customer feel they need to have it. Research shows that 40% of consumers are likely to share images of unique or branded packaging on social media [2], turning your box into free marketing.
Finally, your packaging communicates your brand’s story and values. The materials you choose, the colors you use, and the information you display all tell a story. Is your brand luxurious and exclusive? Fun and trendy? Eco-conscious and natural? Your packaging should answer these questions at a glance, without a single word of explanation.
Getting these elements right is a cornerstone of building a successful business. It’s one of the key pillars in the journey of launching a new lash line — a process we cover comprehensively in our complete guide to starting a lash brand.
Step 1: Define Your Brand & Target Customer
Before you even think about box shapes or colors, you must have a crystal-clear understanding of your brand identity and your ideal customer. Every design decision — from the weight of the cardboard to the font on the label — should flow from this foundation. Skipping this step is the single most common reason brands end up with packaging that feels generic or inconsistent.
Ask yourself: who are you selling to, and what do they value? Are you targeting professional lash artists who need a premium, durable product that signals expertise? Or are you aiming for Gen-Z consumers who want trendy, affordable styles for a weekend look and love sharing their unboxing experience online? The answers to these questions will shape everything.
A luxury brand targeting high-end salons, for instance, might opt for a minimalist design with a heavy rigid box and subtle gold foil stamping to signal exclusivity and craftsmanship. In contrast, a brand focused on sustainability could use recycled kraft paper and simple one-color printing to communicate its eco-friendly values authentically. Knowing your niche will guide your choices and ensure your packaging resonates deeply with the right audience.
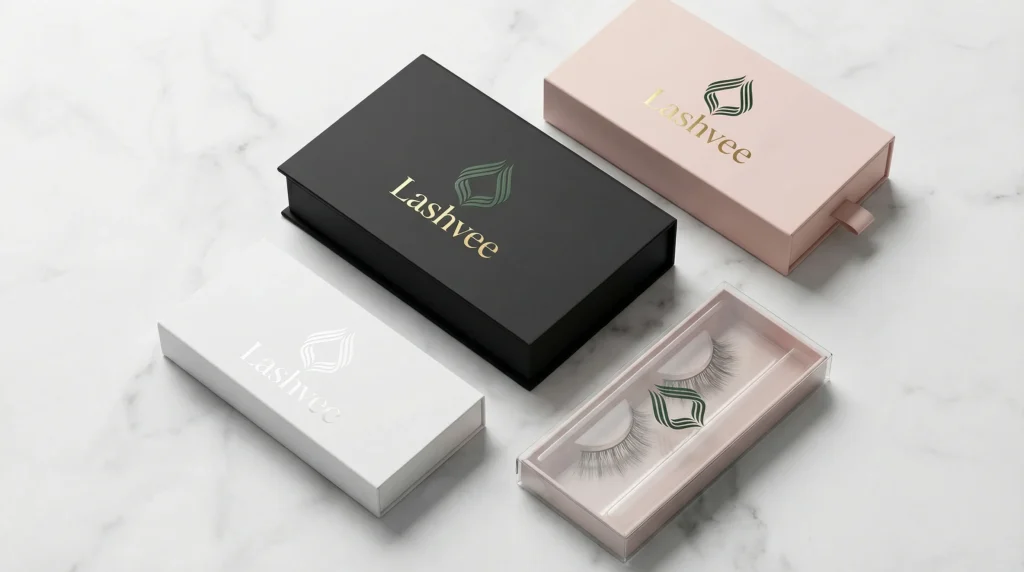
Step 2: Choose the Right Packaging Structure
The structure of your box affects everything — from perceived value and unboxing experience to shipping costs and durability. Choosing the right style is about balancing your brand’s aesthetic with the practical demands of your sales channel. A product sold primarily online needs to be robust enough to withstand the rigors of international shipping, while an item in a physical retail store might benefit from a window that allows customers to see the product before buying.
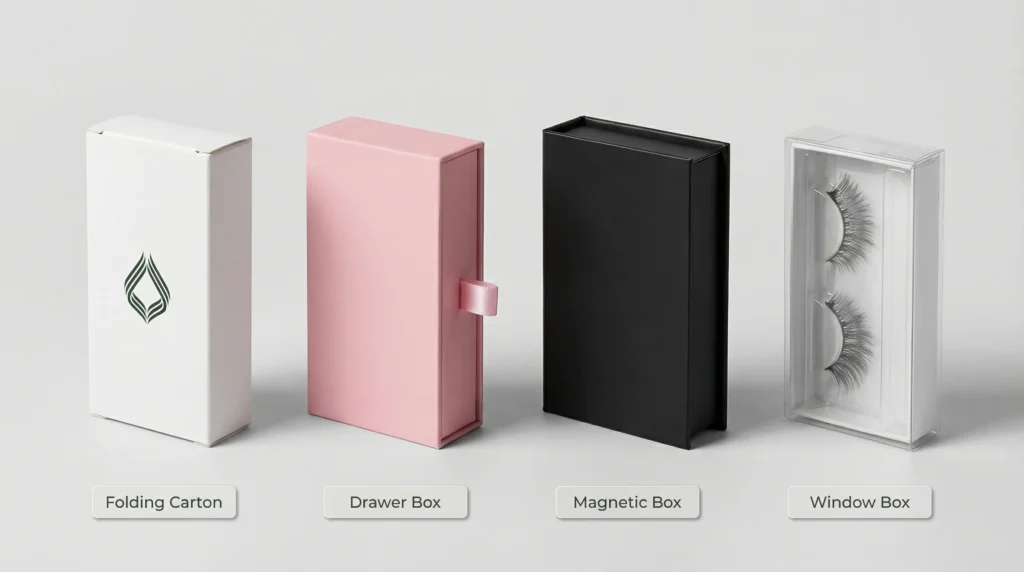
Here is a quick comparison of the most popular structures to help you decide:
| Structure Type | Best For | Key Advantages | Key Considerations |
|---|---|---|---|
| Folding Carton | E-commerce, Startups, High Volume | Cost-effective, ships flat, low MOQ | Less premium feel; needs sufficient board thickness |
| Drawer-Style Box | Salon Retail, Mid-to-Premium Brands | Excellent unboxing experience, feels substantial | Higher unit cost; requires precise assembly |
| Magnetic “Book” Box | Luxury Lines, PR Kits, Gift Sets | Highest perceived value, very durable | Most expensive; heavier, which impacts shipping cost |
| Window Box | Physical Retail, Visual-first Brands | Shows the actual product, reduces purchase hesitation | Window film can scratch; less protective in transit |
Each of these structures can be fully customized to match your brand’s identity. For a deeper look into the materials, finishes, and specific options available for each style, explore our detailed guide on Custom Lash Packaging, which covers everything from folding cartons to luxury rigid boxes.
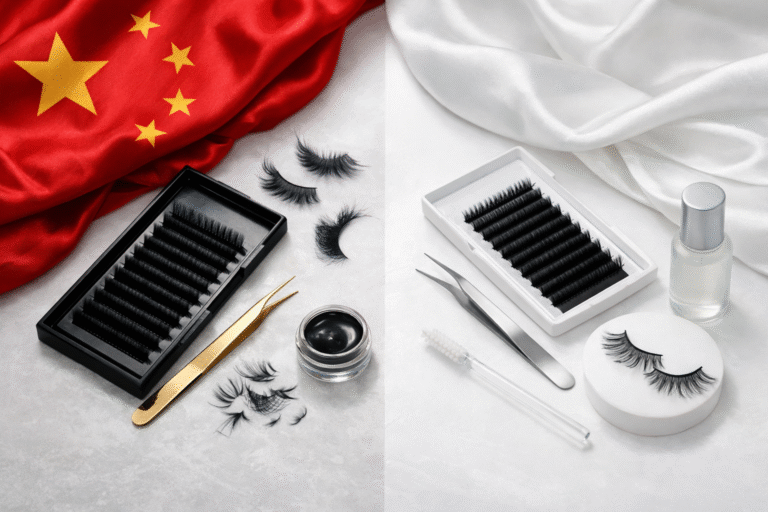
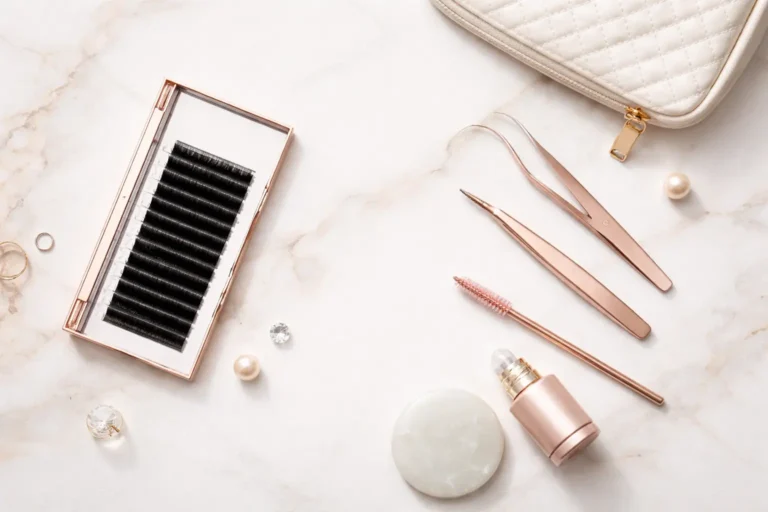
Step 3: Select Materials & Finishes That Wow
The details are what elevate a good design to a great one. The texture of the box, the shine of a logo, and the quality of the paper all contribute to the customer’s perception of your brand. High-quality materials and thoughtful finishes signal that you’ve invested in your product — and that investment is something customers can feel the moment they pick up the box.
When it comes to materials, paperboard is the versatile and cost-effective foundation for most brands. It offers a great print surface, ships flat to reduce freight costs, and comes in a range of thicknesses. For brands targeting the premium market, rigid board (also known as greyboard) offers a heavier, more luxurious feel that signals quality before the box is even opened. For eco-conscious brands, kraft paper and other recycled or FSC-certified materials are an excellent way to reinforce your brand message authentically.
Finishes are the special touches that truly make your packaging pop. A matte lamination offers a modern, sophisticated feel that photographs beautifully, while a glossy finish creates a vibrant, high-energy look. Special processes like foil stamping (adding shimmering metallic details to your logo or text), embossing (creating a raised pattern that customers can feel), or spot UV (applying a glossy coating to specific areas for a striking contrast against a matte background) can add a touch of luxury that justifies a premium price point.
A practical tip: rather than applying multiple special finishes at once, choose one hero effect — such as a small foil logo on a matte box. This approach looks more expensive and intentional than over-decorating, and it keeps your production costs predictable.
Step 4: Master the Visual Design Elements
With your structure and materials chosen, it’s time to focus on the visual design itself. This is where your brand’s personality truly comes to life. Consistency across every visual element is the key to building a recognizable brand that customers remember and return to.
Your logo is the hero of your packaging. It should be placed prominently and clearly, and you should always ensure you have a high-resolution vector file of your logo to avoid any pixelation or blurriness in the final print. A logo that looks crisp and professional on the box immediately elevates the perceived quality of the entire product.
Color psychology plays a powerful role in how customers perceive your brand. Pinks and pastels evoke a feeling of femininity and softness, making them popular for everyday wear brands. Black and gold signal luxury and drama, ideal for a high-end positioning. Bright, bold colors feel energetic and fun, resonating with a younger, trend-driven audience. Your color palette should be a deliberate choice that aligns with the emotions you want to evoke in your target customer.
Typography is equally important and often underestimated. The fonts you use should be easy to read and should match your brand’s personality. A widely used best practice is to pair a more distinctive or decorative font for your brand name with a clean, simple sans-serif font for all product information. This combination creates visual interest while ensuring that critical details like the lash style name remain perfectly legible.
Finally, consider your information hierarchy — what you include on the box and how prominently you feature it. At a minimum, your packaging should include your logo, the lash style name, and your website or social media handle. Key selling points like “Vegan & Cruelty-Free” or “Handmade” can be powerful additions. The golden rule is to keep it clean: don’t overcrowd the design with text or graphics that compete for attention.
Step 5: From Design to Production with Your Manufacturer
Once you have a clear vision for your design, it’s time to bring it to life — and this is where a strong manufacturing partner becomes truly invaluable. You can choose to create the design yourself using templates provided by the manufacturer, or you can work with their in-house design team to develop a professional, print-ready concept from scratch.
At Lashvee, we collaborate with brands at every stage to ensure the final product is exactly right. Our process is designed to be simple, transparent, and efficient, removing the guesswork from a process that can feel overwhelming for first-time brand owners.
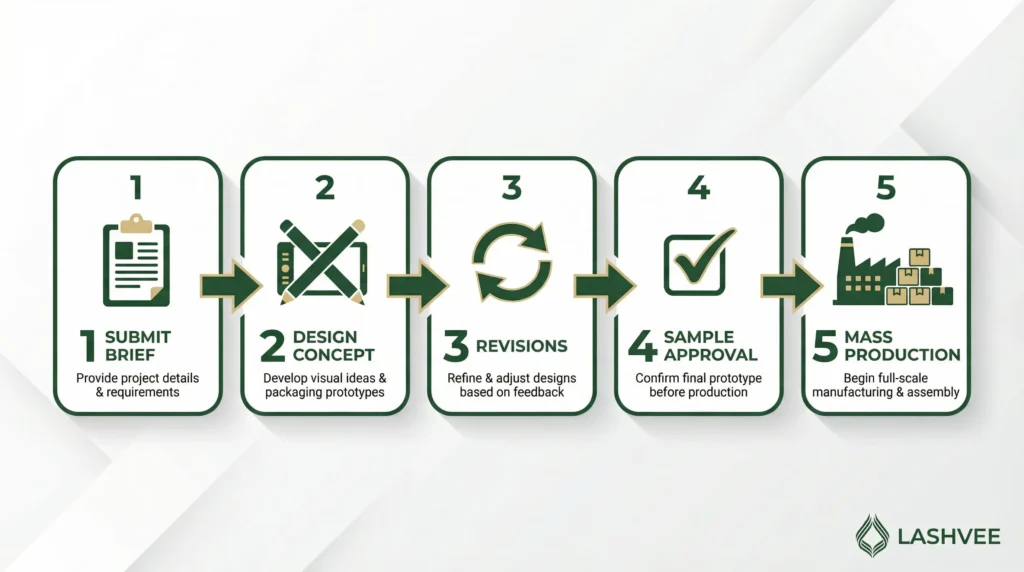
The process begins when you submit your brief — sharing your logo, brand guidelines, color preferences, and any inspiration images. From there, our design team develops initial concept mockups and a dieline (the flat structural template for the box) for your review. We then work through revisions together until the design is exactly what you envisioned. Before any bulk production begins, we create a physical sample for you to approve, allowing you to see, touch, and evaluate the real product. Only after you’re fully satisfied do we proceed to mass production.
This collaborative approach ensures a high-quality outcome and eliminates costly surprises. Whether you need a simple, elegant box for your first product launch or a complex, fully customized luxury solution, our OEM/ODM services are built to support brands at every stage of growth. If you don’t yet have a designer on your team, our dedicated Lash Packaging Design Service can handle the entire creative process for you, from initial concept to print-ready files.
Common Mistakes to Avoid in Lash Packaging Design
Even with the best intentions, a few common missteps can undermine an otherwise excellent product. Being aware of these pitfalls before you start will save you time, money, and frustration.
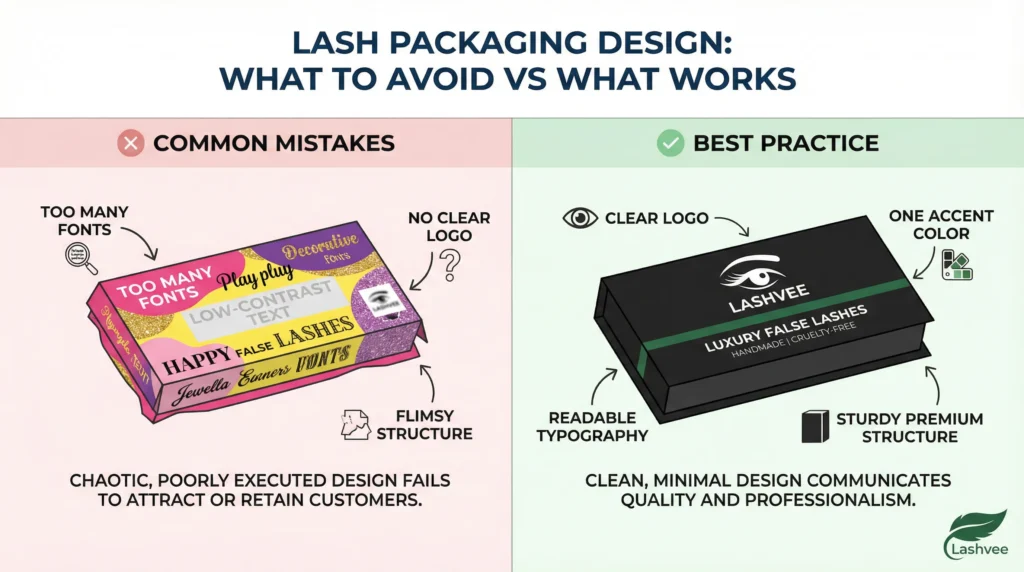
Overly complicated or cluttered designs are perhaps the most common mistake. In an attempt to stand out, many new brands use too many colors, fonts, and graphical elements simultaneously. The result is a design that looks unprofessional and is difficult to read. A clean, focused design with a clear visual hierarchy is almost always more effective — and more memorable — than a busy one.
Forgetting the inner tray is another frequent oversight. The insert that holds the lash tray in place inside the box is just as important as the outer packaging. A poorly fitting or flimsy insert causes the lashes to rattle around during shipping, which can damage the curl and create a messy, unprofessional presentation when the customer opens the box.
Ignoring shipping durability is a mistake that can be particularly costly. A beautiful box that arrives crushed or scuffed creates a terrible first impression that can permanently damage a customer’s perception of your brand. Always choose materials and structures that are appropriate for your primary sales channel. If you sell primarily online and ship internationally, sturdiness must be a top priority.
Using low-resolution graphics is a technical mistake with very visible consequences. Always provide your design files in a vector format — Adobe Illustrator (.ai), PDF, or EPS — for logos and other key design elements. Using low-resolution images copied from a website will result in a blurry, pixelated print that undermines the premium feel you’re working so hard to create.
Your Packaging Is the First Promise You Make to Your Customer
Designing packaging that sells is a journey that begins with a deep understanding of your brand and ends with a product that genuinely delights your customers. By following these steps — defining your brand, choosing the right structure, selecting premium materials, mastering your visual design, and partnering with an experienced manufacturer — you can create packaging that is so much more than just a box.
It is an investment in your brand’s future, a powerful marketing tool, and the very first promise you make to your customer. Get it right, and you’ll build a brand that customers remember, repurchase, and enthusiastically recommend to others.
Ready to create packaging that elevates your brand and drives real sales? The team at Lashvee is here to help you every step of the way. With factory-direct pricing, in-house design support, and a proven track record with 300+ global brands, we have everything you need to bring your vision to life. Contact us today for a free consultation and packaging quote.
Frequently Asked Questions
What is the minimum order quantity (MOQ) for custom lash packaging?
The MOQ varies depending on the complexity of the design and the materials chosen. For simpler folding cartons, MOQs can start at around 500–1,000 units, making them an accessible option for new brands. For more complex structures like rigid magnetic boxes, the MOQ is typically higher due to tooling and setup costs. The best approach is to discuss your specific needs and budget directly with your manufacturing partner to find the right starting point.
How long does it take to produce custom lash boxes?
The timeline depends on several factors, including design complexity, material availability, and the sampling process. After a design is finalized and the physical sample is approved, mass production typically takes between 3 to 5 weeks. Building in time for the sampling and revision stages is important, so we recommend starting the packaging process well in advance of your planned launch date.
Can I get a physical sample of my packaging before placing a bulk order?
Absolutely — and we strongly recommend it. A physical sample is a critical quality control step that allows you to check the colors, materials, construction, and overall feel of your box before committing to a full production run. This step prevents costly mistakes and ensures you are 100% satisfied with the final product. Never skip the sample stage.
What file formats do I need to provide for my packaging design?
For the best print quality, always provide your design files in a vector format. The most common and preferred formats are Adobe Illustrator (.ai), PDF, or EPS. These formats ensure that your logo and other design elements can be scaled to any size without losing quality, resulting in a crisp, professional print. If you don’t have vector files or a designer, Lashvee’s Packaging Design Service can create everything from scratch.
How do I choose between a matte and glossy finish for my lash boxes?
Both finishes have their merits, and the right choice depends on your brand’s positioning. Matte lamination offers a modern, sophisticated look that is highly popular in the premium beauty market — it also tends to be more fingerprint-resistant, which is practical for products handled frequently in salons.
A glossy finish creates a vibrant, eye-catching look that can make colors appear more saturated and bold. Many brands use a combination of both, such as a matte base with a spot UV logo, to create a striking contrast.
References
[1] Meyers. (2024, January 3). 12 Insightful Packaging and Printing Statistics to Know (2024). Meyers Printing. Retrieved from https://meyers.com/meyers-blog/packaging-and-printing-industry-statistics-to-know/
[2] BR Printers. (n.d.). Powerful Packaging Marketing Stats for 2024. BR Printers. Retrieved from https://www.brprinters.com/packaging-marketing-stats/
[3] Robinson, C. (2024, February 28). Psychology Of Product Packaging, How It Plays Into Profitability. Forbes. Retrieved from https://www.forbes.com/sites/cherylrobinson/2024/02/28/psychology-of-product-packaging-how-it-plays-into-profitability/